We are getting reference images for our character designs.
We did a value study where we painted shading onto some shapes.
Monday, 29 September 2014
Tuesday, 23 September 2014
First lesson with Andrew, year 2
Andrew introduced us to the 511AAD Game Business & Finance module.
In the beginning, games were made by very small groups or by individuals. In the 90s, games started to become a little more advanced and started to require bigger development teams. By the 00s, the development teams required by AAA games was huge. Now more recently, tools and assets have become more widely available and games have become much easier to produce, this resorted in a reduction in the man power needed to produce games.
We had a look at the Unity asset store.
For task 3 we have been told we'll need to research the asset store and document our research with screenshots and a write up on why I have chosen to create my chosen assets.
Monday, 22 September 2014
First day back, year 2
Today was the first day back at college beginning my 2nd year of FdA Games art!
We each gave a short presentation to the rest of the class about what we had got up to over the summer holidays. I talked about my trip to the fasting retreat in Costa Rica where I completed a 30 day water-only fast.
Mike showed us the first brief for our upcoming projects and he gave a presentation about cultural context in games; going into how games vary in different countries.
Tuesday, 13 May 2014
Concept Character Bust - Scarecrow
My final project with Tony was to create a concept for a character bust and a game menu to go along with it. The purpose of the project was to create a realistic looking bust of a character with all of the muscle groups and body of a human.
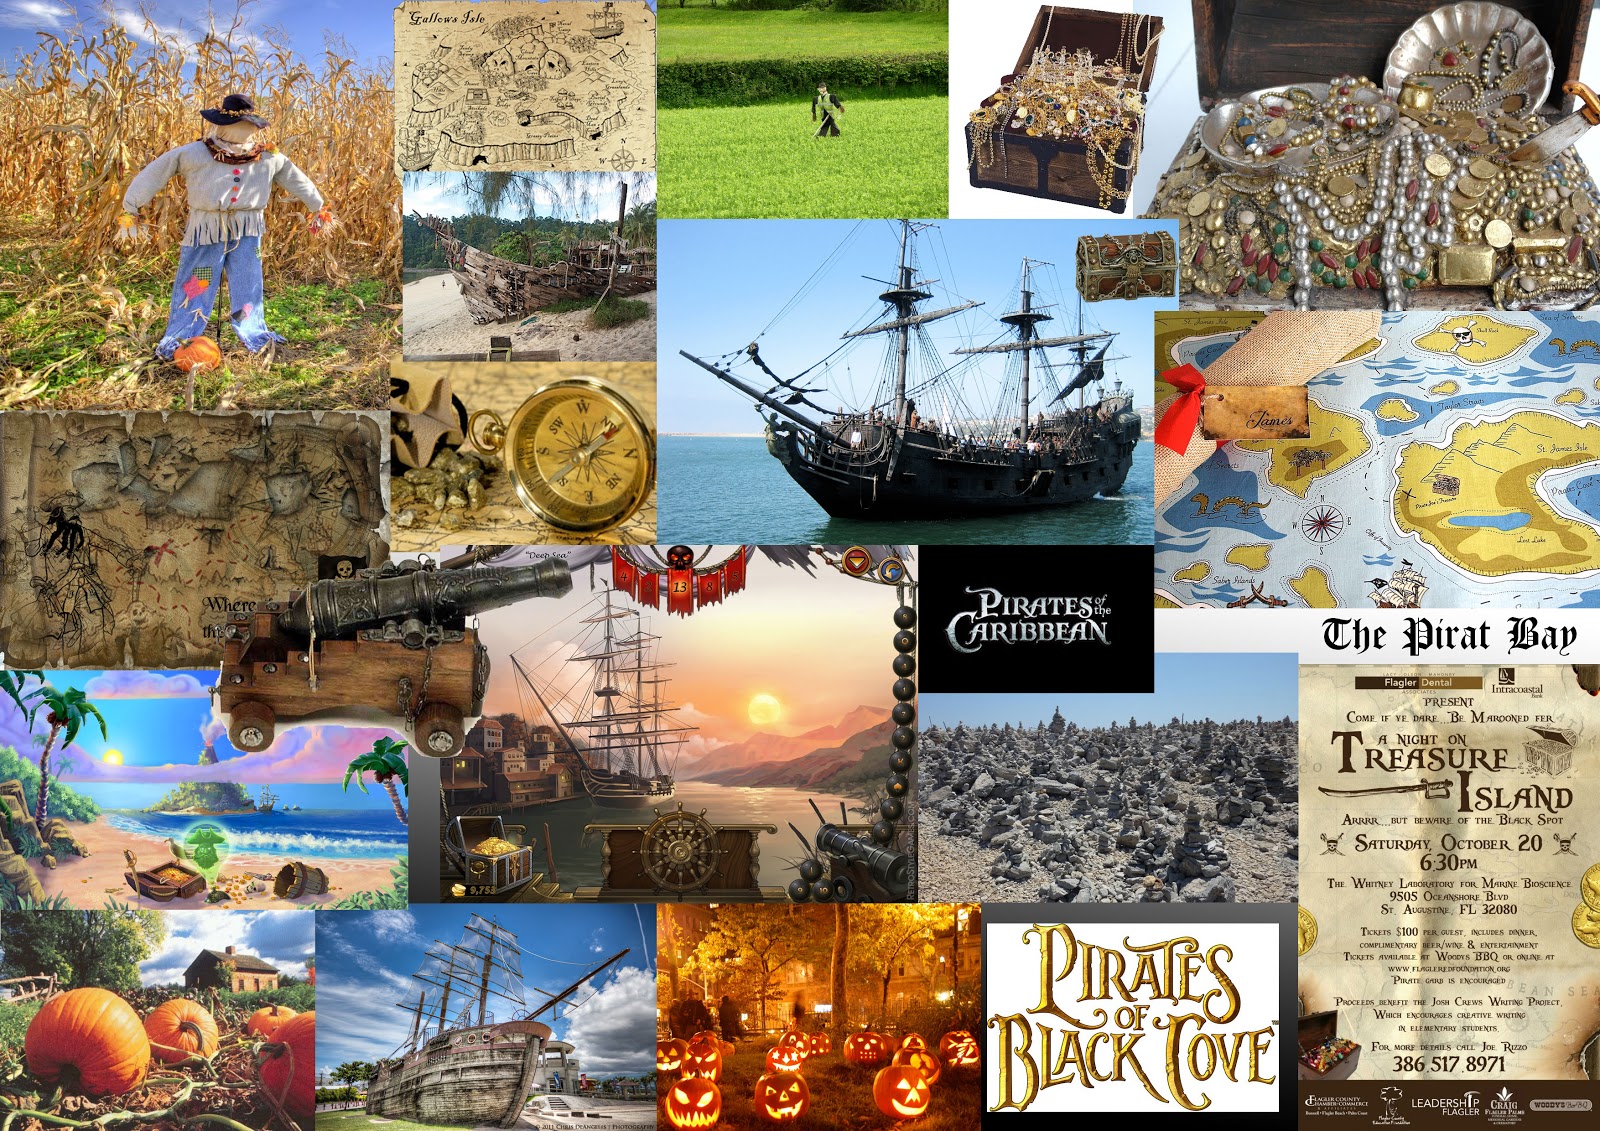
My chosen idea for the project was to create a scarecrow with a pirate hat and coat.
Synopsis:
One day there was a group of pirates raiding a farm, the character got unlucky and he ended up becoming cursed by the witch that lived there. His crew-mates abandoned him there thinking he was a goner and his body started to turn into what can only be described as being like a scarecrow. The idea of the game is to play as this pirate (now a scarecrow), being controlled by the curse set upon him to do work on the farm and to scare away intruders and pests.
The first thing I did for this project was to create mood boards for inspiration, I searched for images that I liked or images which seemed relevant to my concept idea.

I liked the big pirate hat and the coat so I decided to base it on the image of the pirate. The scarecrow face on the left was the look I decided to create the characters face like. I had the idea of making a bird to perch on the scarecrow's arm.
The scarecrow sculpture progress:
Today I started making the character bust, I used a long piece of wire and twisted it to create the bone structure for the bust. For the arm I used a second piece of twisted wire wrapped around the main one, this worked well keeping the structure intact whilst sculpturing it.
Today's lesson, I added layers onto the sculptures face, chest and back to build up the form a little bit.
I also created the sack texture over the character's face by rolling out a flat sheet of clay and then by wrapping it around the face and then drawing on it to create a rough surface.
Today I created the hat, using a sheet of wire mesh cut into a circle, also a roll of wire mesh for the inside of the hat. Before creating the top of the hat from the hole, I measured it to fit his head. Using a role of wire mesh I was about to create the top of the hat structure which I was then able to use a roll of thin clay to cover. The whole hat was coated in thin layers of clay.
Once the hat had been made, I placed it over the scarecrow's head, bent it a bit to give it the right shape.
I was able to create a feather to place inside of the hat by getting a roll of clay and sticking it to a very small piece of wire.
The clothing was made using thin layers of clay that had been rolled out using a rolling pin and small amounts of oil. I was able to create a realistic looking coat by allowing the layer of clay to become creased while wrapping it over the model. Once the object was baked the model of the bird didn't come out very well.
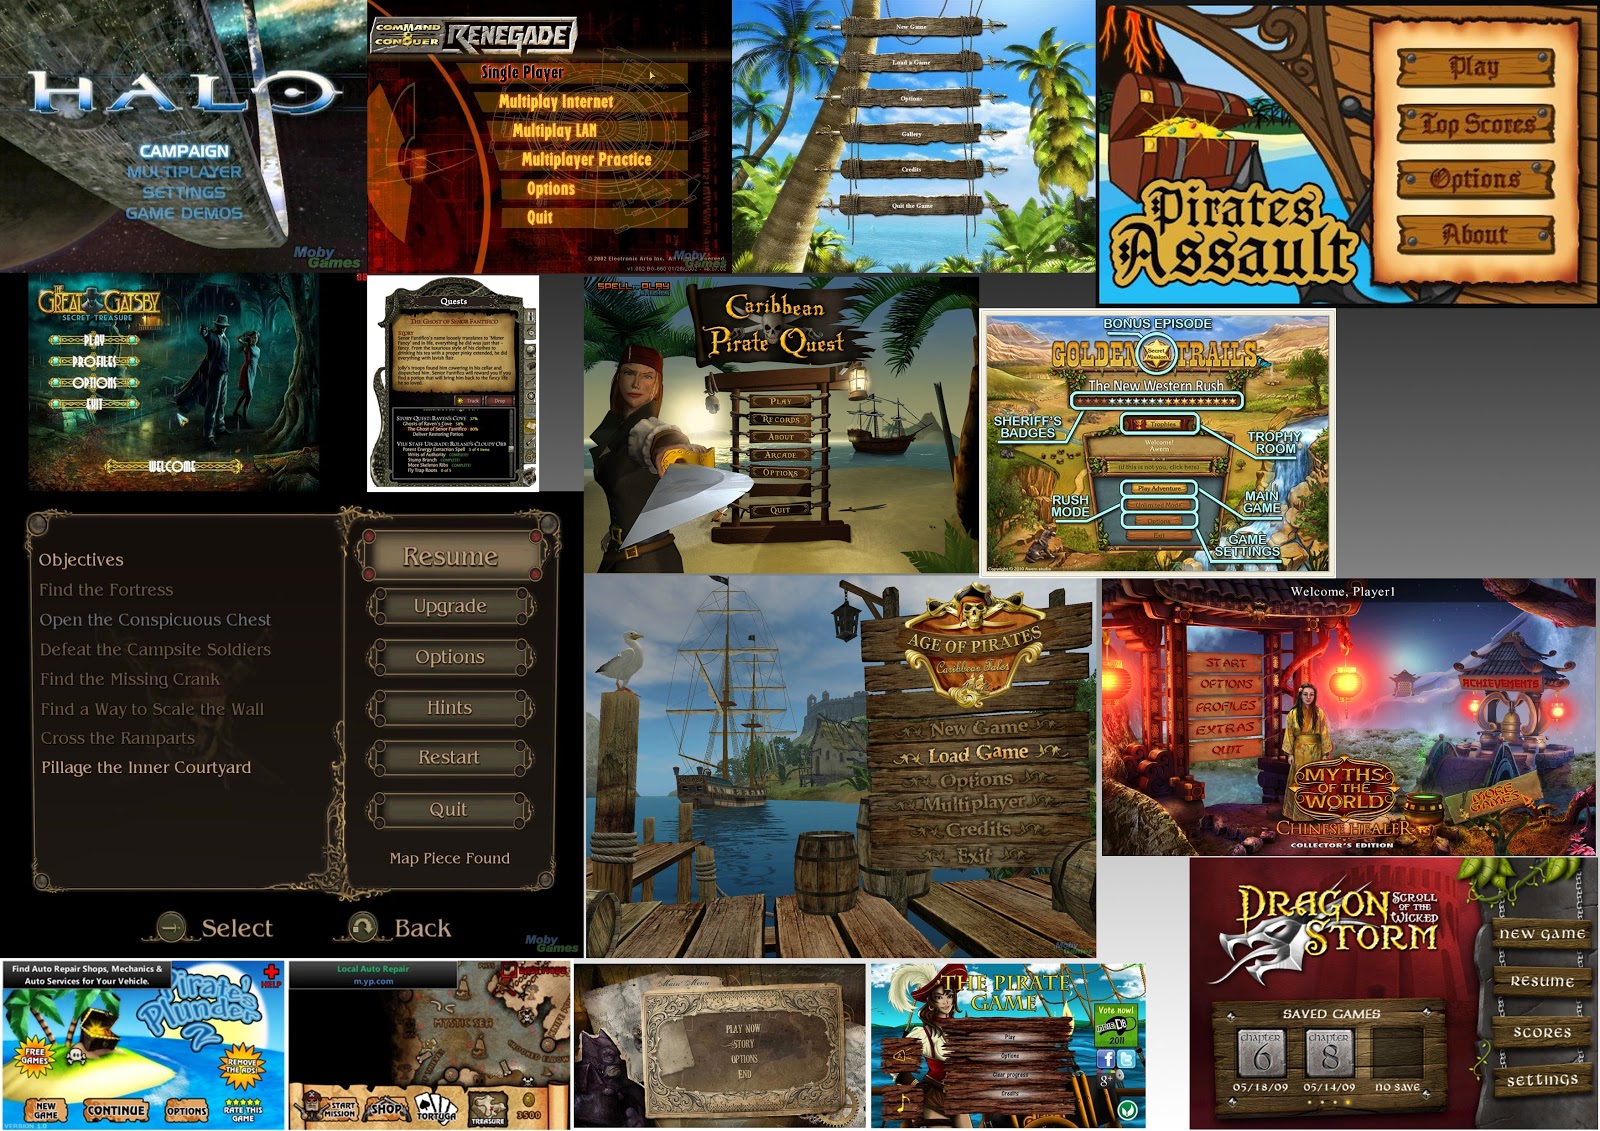
The game menu I created for this project was made up of a photo of some land, bird feathers and skulls. My inspiration came from looking at other game menus.
I took photos of some farm land which I planned to use as the background in my menu.
I decided to go along with a Sans serif font for the game name, it creates a clean and readable look to the title. The bird and skull works well as it gives the idea of it being cursed, and the crow feathers are relevant to the whole scarecrow theme.
My chosen idea for the project was to create a scarecrow with a pirate hat and coat.
Synopsis:
One day there was a group of pirates raiding a farm, the character got unlucky and he ended up becoming cursed by the witch that lived there. His crew-mates abandoned him there thinking he was a goner and his body started to turn into what can only be described as being like a scarecrow. The idea of the game is to play as this pirate (now a scarecrow), being controlled by the curse set upon him to do work on the farm and to scare away intruders and pests.
The first thing I did for this project was to create mood boards for inspiration, I searched for images that I liked or images which seemed relevant to my concept idea.
I liked the big pirate hat and the coat so I decided to base it on the image of the pirate. The scarecrow face on the left was the look I decided to create the characters face like. I had the idea of making a bird to perch on the scarecrow's arm.
The scarecrow sculpture progress:
 |
| 18th March |
Today's lesson, I added layers onto the sculptures face, chest and back to build up the form a little bit.
 |
| 25th March |
 |
| 25th March |
 |
| 1st April |
Today I created the hat, using a sheet of wire mesh cut into a circle, also a roll of wire mesh for the inside of the hat. Before creating the top of the hat from the hole, I measured it to fit his head. Using a role of wire mesh I was about to create the top of the hat structure which I was then able to use a roll of thin clay to cover. The whole hat was coated in thin layers of clay.
 |
| 1st April |
 |
| 1st April |
 |
| 29th April |
The game menu I created for this project was made up of a photo of some land, bird feathers and skulls. My inspiration came from looking at other game menus.
I took photos of some farm land which I planned to use as the background in my menu.
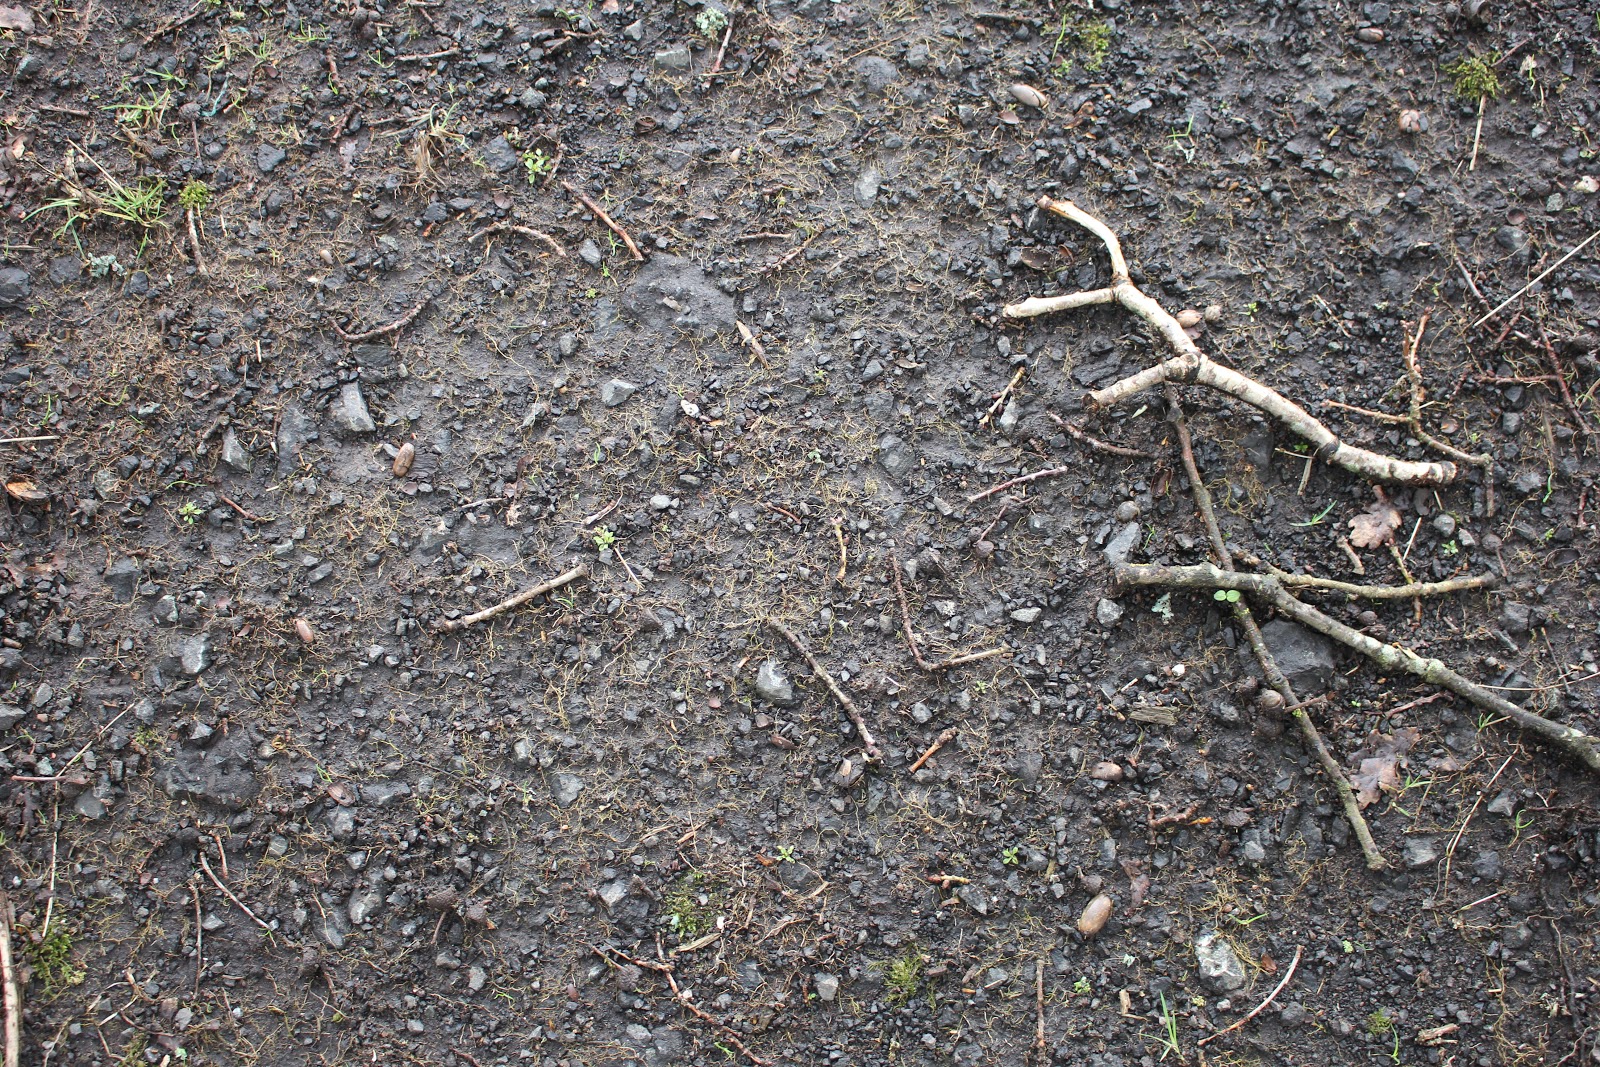 |
| The twigs seem to work well with the idea of a scarecrow |
 |
| I arranged feathers with the skull to create a symbol |
 |
| Game menu |
Friday, 9 May 2014
Modular Environment production for games
Modular environments help save time in their creation and resources because it allows the game engine to instance objects to save processing power or memory.
Texture mapping using a 'Main Texture map' or 'Texture Atlas' is when there are multiple textures in the scene saved into the same texture file, usually in a large 1024, 2048 or 4096 texture.
To create a 'Texture Atlas' in Photoshop we need to first choose a square image size ideally big enough to meet the texture space needs and then using the 'Guides, Grid & Slices' preferences we typically set up the Grid line to be every 128, 256 or 512 pixels. The subdivisions option can be set to 2 or 4 depending on if we need extra grid lines. It is important to be sure the grid is set to use Pixels as the measurement.
Once we have created a 'Texture Atlas' we can create a plane object in 3ds Max with an equal amount of segments as the texture (length and height are 1 meter). Converting the plane into an editable poly then allows us to select the faces of the parts we need (such as a door or a window) then we can click on 'Detach' under the 'Edit Geometry' options in the Modify panel.
This is just a quick example I have made in order for me to explain how practically this can be used in game design to speed up the process of level creation; creating cut out objects from a texture map allows us to quickly create a level and it is useful for creating modular pieces (like lego) as all of the objects will be of the same sizes.
Texture mapping using a 'Main Texture map' or 'Texture Atlas' is when there are multiple textures in the scene saved into the same texture file, usually in a large 1024, 2048 or 4096 texture.
To create a 'Texture Atlas' in Photoshop we need to first choose a square image size ideally big enough to meet the texture space needs and then using the 'Guides, Grid & Slices' preferences we typically set up the Grid line to be every 128, 256 or 512 pixels. The subdivisions option can be set to 2 or 4 depending on if we need extra grid lines. It is important to be sure the grid is set to use Pixels as the measurement.
 |
| Example of how a Texture Atlas holds different textures |
 |
| A quick example |
Friday, 28 March 2014
Slow in / Slow out / Pose to Pose - Walking animation
'Pose to Pose' is where the animator will create the main key frame(s) poses before working on the finer details in the animation. Once the main key frames are set, the frames between them can be done afterwards more easily. Creating Pose to Pose animations will save the animator time because the computer will generate the frames between the key poses and all the animator needs to do then is refine the frames between.
'Pose to Pose' animating is a good way to create looped animations such as walking, the start and end frames can be set so that the model is in the exact same position as in the first frame.
 |
| Start and End frame pose |
 |
| Half way-in frame pose |
Once the beginning, middle and end frames are set the animator can then go in and add in frames between the main pose key frames.
 |
| 1/4th of the way in to the walk cycle |
'Slow in and Slow out' is about increasing the realism of an animation; in real life an object will never completely stop moving in an instant, it will gradually slow down before coming to a stop. The idea is to make things flow more naturally where objects or limbs will gradually increase or decrease in their movement speed.
Changing the key frame 'Bias' in an animation will remove the popping effect which occurs when the object changes direction by making the movement smoother; it's slow in and slow out.
A visual example of what slow in and slow out looks like is this picture of a pendulum.
 The ball slows down as it reaches the ends of it's swinging range but speeds up as it moves towards the middle.
 |
| Increasing the Bias on the first frame |
 |
| Decreased the Bias on the last frame |
A visual example of what slow in and slow out looks like is this picture of a pendulum.

Friday, 21 March 2014
Staging / Solid Drawing / Appeal - Emotional Poses
Today we were given a scene with two human characters and our task was to modify the scene.

This is a render of what I ended up with; the guy on the left is being startled by the guy on the right (jumping out to scare the guy on the left).
Using a circle spline shape; the camera was then animated to fly in a circle around the scene using the animation path constraint.
'Staging' is one of the animation principles that dictate how the animation appears to the viewer, it also helps direct the viewer to the main points of interest.
The camera positioning is important when setting a scene to make sure the characters are visible and clear, the characters need to be facing the viewer so that they draw attention.
The character positions must be open to the viewer to draw in attention, the body positioning can lead the viewers eyes to look at the main focus point; they must be positioned so that their expressions or actions can be recognised as a silhouette.
Scene lighting must be set up so that the scene looks right, if it's too light or dark it can ruin the composition.
Extreme poses

An example of bad staging is having the characters facing away from the viewer preventing their faces from being seen, a scene where the characters are out of place and not fitting with the theme, the character silhouette being unrecognisable.
Good staging is having the characters turned to face the camera so their faces or body language is visible, having spooky characters in a spooky house and the character silhouette being recognisable.
In game design, staging is about positioning of the lighting, the game objects, character positioning, debris, shapes and the environment.
'Solid Drawing' is a principle of taking into account the form and 3d space of a character or object and giving them weight and volume. Solid Drawing needs knowledge of volume, weight and anatomy.
In 3D animation, the character needs to be able to move limbs and stretch in places that might look odd when animated. Extra polygons in the elbows and knees for instance may help to keep the object looking realistic.
The founders of the 12 principles said that two characters should not look identical as it makes them look lifeless.
'Appeal' is the principle which creates appeal towards a character. The viewer must find the character feel to be real and interesting in order for it to be appealing.
The characters movement should be fluid and it should flow, a clumsy or awkward movement is unappealing to the viewer.
The personality and appearance are important for creating appeal, the way the character moves or looks. Humanising a robot can create a more appealing character.

Using a circle spline shape; the camera was then animated to fly in a circle around the scene using the animation path constraint.
'Staging' is one of the animation principles that dictate how the animation appears to the viewer, it also helps direct the viewer to the main points of interest.
The camera positioning is important when setting a scene to make sure the characters are visible and clear, the characters need to be facing the viewer so that they draw attention.
The character positions must be open to the viewer to draw in attention, the body positioning can lead the viewers eyes to look at the main focus point; they must be positioned so that their expressions or actions can be recognised as a silhouette.
Scene lighting must be set up so that the scene looks right, if it's too light or dark it can ruin the composition.
Extreme poses
Good staging is having the characters turned to face the camera so their faces or body language is visible, having spooky characters in a spooky house and the character silhouette being recognisable.
In game design, staging is about positioning of the lighting, the game objects, character positioning, debris, shapes and the environment.
'Solid Drawing' is a principle of taking into account the form and 3d space of a character or object and giving them weight and volume. Solid Drawing needs knowledge of volume, weight and anatomy.
In 3D animation, the character needs to be able to move limbs and stretch in places that might look odd when animated. Extra polygons in the elbows and knees for instance may help to keep the object looking realistic.
The founders of the 12 principles said that two characters should not look identical as it makes them look lifeless.
'Appeal' is the principle which creates appeal towards a character. The viewer must find the character feel to be real and interesting in order for it to be appealing.
The characters movement should be fluid and it should flow, a clumsy or awkward movement is unappealing to the viewer.
The personality and appearance are important for creating appeal, the way the character moves or looks. Humanising a robot can create a more appealing character.
Friday, 14 March 2014
Arcs / Timing / Secondary animation / Exaggeration - Pinball Obstacle Course animation
Objects move in an arc path or slight curved path; humans, animals, characters, etc. It is usually mechanical objects which move in a straight path.
On my follow through animation, the pendulum has a more of a mechanic feel to it because the platform moves in straight lines without any curves.


'Exaggeration' is where the animator will use extreme distortion of the character or object to create a more interesting look to the animation.
 When creating a realistic animation, things will be done more subtly; in a cartoon or comic though things will be more exaggerated to get across what is happening.
Here in my bouncing balls collision animation I squash the ball on the left to exaggerate the impact of the ball before it bounces back up off the ground.

Body parts always move in arcs or curved paths; the weight is transferred in the body parts and limbs have limited ranges of movement due to their skeleton. Moving our animations in this way means that the animation will be more natural and believable to the viewer.
Here is my obstacle course animation, as you can see by looking at the trajectory displayed, the ball follows a path of curves and arcs. The curves and arcs in the ball's path shows that it will move in a realistic and natural way.
 |
| Trajectory turned on |

'Secondary Animation' is having an additional animation or action along side the main animation. The idea is to make the primary animation more effective. To make a secondary animation work well, it needs to support the primary animation. Once the primary animation is working well, the animator can then work on the secondary one.
In my pendulum animation, the ball swinging about under the box is the secondary animation for the scene as it follows the moving box adding in some exaggeration and weight to the object.
'Timing' is an important part of animation, it would look wrong if the timing was off and can end up making things look unrealistic if it's not timed correctly.
The key frames need to be spaced correctly and timed at the right times. Timing of a bouncing ball can change the perceived physics and weight of the floor or the ball that is bouncing.
With my bouncing balls animation, I was able to create the affect of different weights by changing the timing of each ball so that there was the illusion of there being a heavier ball.


'Exaggeration' is where the animator will use extreme distortion of the character or object to create a more interesting look to the animation.

Here in my bouncing balls collision animation I squash the ball on the left to exaggerate the impact of the ball before it bounces back up off the ground.

Friday, 7 March 2014
Overlapping / Follow-through animation - Pendulum
Today we were given a scene to animate, the task was to create an overlapping / flow-through animation using the ready made pendulum rig.
In creating this animation, I first drew out a plan of what my animation will be on paper. In 3ds Max I set the Auto Key on and moved the box to the start position, I then selected key-frame 10 and then I moved the object to the 2nd position; repeating this process of changing the key-frame and moving the object until I had all 7 movements key-framed in. I used shift + drag (copy key-frame) from frame 0 to frame number 100 so that the animation would be looped. Next I animated the pendulum objects by rotating them with 'Use Pivot Point Center' selected in the Rotate tool.
Follow through means that separate parts of an object may continue moving after has stopped. It adds the feeling of there being weight and physics into the animation; when a pendulum moves, the ball will swing back and forth even after the object carrying it has stopped.
In animating a human character, various body parts will move at different times meaning the different limbs may overlap other movements. If the character comes to a complete stop, their hair might follow through the main action to convey it's light weight and improve realism. Limbs can have their movement frames delayed by a few frames.
"It is not necessary for an animator to take a character to one point, complete that action completely, and then turn to the following action as if he had never given it a thought until after completing the first action. When a character knows what he is going to do he doesn't have to stop before each individual action and think to do it. He has it planned in advance in his mind." – Walt Disney
 |
| The red path shows where the object moves |
In creating this animation, I first drew out a plan of what my animation will be on paper. In 3ds Max I set the Auto Key on and moved the box to the start position, I then selected key-frame 10 and then I moved the object to the 2nd position; repeating this process of changing the key-frame and moving the object until I had all 7 movements key-framed in. I used shift + drag (copy key-frame) from frame 0 to frame number 100 so that the animation would be looped. Next I animated the pendulum objects by rotating them with 'Use Pivot Point Center' selected in the Rotate tool.
 |
| The pendulum swings backwards as the platform moves forwards |
 |
| When the platform comes to a halt, the pendulum swings back and forth |
 |
| As the platform moves faster, the pendulum moves back further |
 |
| After the platform stops, the pendulum swings and continues to do so as the platform moves downwards |
In animating a human character, various body parts will move at different times meaning the different limbs may overlap other movements. If the character comes to a complete stop, their hair might follow through the main action to convey it's light weight and improve realism. Limbs can have their movement frames delayed by a few frames.
"It is not necessary for an animator to take a character to one point, complete that action completely, and then turn to the following action as if he had never given it a thought until after completing the first action. When a character knows what he is going to do he doesn't have to stop before each individual action and think to do it. He has it planned in advance in his mind." – Walt Disney
Friday, 28 February 2014
Squash and Stretch / Anticipation - Bouncing Ball
In this module we are learning the 12 principles of animation, today we are covering 'Squash and Stretch' and 'Anticipation'.
We were given a scene which contained a sphere object, our task was to animate it so that it bounces around and after that we animated two spheres making them bounce into each other. The objects were rigged so that the object could be squashed and stretched and we incorporated this into the animation.
I learnt how to copy key-frames by using the Shift key, whilst dragging the key-frame selector.
The purpose of squash and stretch in animation is to give animations the realism and natural flexibility and weight of real objects.
As the ball falls it stretches as it falls and then squashes as it collides with the hard floor, the ball then stretches as it bounces off of the ground before shrinking back to normal size.
Anticipation is when the character or object shows weight before taking action, this can be for example a baseball player preparing to throw a ball or when an enemy character is preparing for an attack. Anticipation can allow the viewers to predict what will happen next and it adds realism to the animation. Without anticipation in an animation it can create unexpected results or the viewers won't find the animation as believable.
When a character prepares to jump by bending legs, this is anticipation. In games, anticipation can allow the player to take action before things happen creating a more interesting gameplay such as allowing the player to avoid attacks from a boss.

We were given a scene which contained a sphere object, our task was to animate it so that it bounces around and after that we animated two spheres making them bounce into each other. The objects were rigged so that the object could be squashed and stretched and we incorporated this into the animation.
I learnt how to copy key-frames by using the Shift key, whilst dragging the key-frame selector.
The purpose of squash and stretch in animation is to give animations the realism and natural flexibility and weight of real objects.
 |
| image from Gamustra |
 |
| Ball falling begins to stretch |
 |
| Ball squashes on colliding with the ground |
 |
| The ball stretches after bouncing off of the floor |
 |
| The balls shape returns to normal as it reaches the end of the bounce |
Anticipation is when the character or object shows weight before taking action, this can be for example a baseball player preparing to throw a ball or when an enemy character is preparing for an attack. Anticipation can allow the viewers to predict what will happen next and it adds realism to the animation. Without anticipation in an animation it can create unexpected results or the viewers won't find the animation as believable.
 |
| image from Gamustra |

Friday, 7 February 2014
What is Concept Art
Concept art is a form of illustrative work used to represent ideas, designs and moods for various subjects. There are many reasons why there is a need for concept art; in the games industry, concept art is used to help the other artists in creating game assets such as 3D models of characters, weapons, items, levels and enemies etc; without the use of concept art, assets created may end up not fitting well together resulting in wasted time and loss of money; the different artists will have their own ideas and their assets may not mix well without the direction of the concept art.
Concept art can be created as either traditional art or digitally in applications such as 'Photoshop' and 'Coral Painter' with the use of a graphics tablet. The artist usually starts off by making lots of thumbnail sketches in order to get as many ideas out on paper in as little time as possible, the best ideas are then taken and improved upon and these eventually become illustrations.
Silhouettes are the quickest way to draw out ideas of characters, it allows the artist to draw without having to think about the details of the design. Once the correct shape has been identified, the artist can then add in more lines and detail by using a contrasting colour.
Concept art can be useful when pitching a game to potential investors or publishers, it can help to sell the idea of a game if the investors like the visual style of the game.
It is not just video games that make use of concept art; for instance animations, films and comic books usually make use of concept art in their creation. Concept art may also be referred to as visual development or concept design, these terms are usually applied to retail designs, set designs, fashion designs and architectural designs.
Concept art can be created as either traditional art or digitally in applications such as 'Photoshop' and 'Coral Painter' with the use of a graphics tablet. The artist usually starts off by making lots of thumbnail sketches in order to get as many ideas out on paper in as little time as possible, the best ideas are then taken and improved upon and these eventually become illustrations.
 |
| Here is an example of thumbnail silhouettes from Jeff's Art 2011 |
Silhouettes are the quickest way to draw out ideas of characters, it allows the artist to draw without having to think about the details of the design. Once the correct shape has been identified, the artist can then add in more lines and detail by using a contrasting colour.
 |
| Designs with added detail and tones from Jeff's Art 2011 |
 |
| Coloured Jeff's Art 2011 |
Concept art can be useful when pitching a game to potential investors or publishers, it can help to sell the idea of a game if the investors like the visual style of the game.
It is not just video games that make use of concept art; for instance animations, films and comic books usually make use of concept art in their creation. Concept art may also be referred to as visual development or concept design, these terms are usually applied to retail designs, set designs, fashion designs and architectural designs.
Light and Shadow
I created an image of 5 primitive shapes in order to show light and shadow.
The varying tones are what create the illusion of a three dimensional object rendering on a flat surface.
 |
| Lighting and Shadows example |
The varying tones are what create the illusion of a three dimensional object rendering on a flat surface.
Colour Theory
Colour wheel, primary colours, secondary and tertiary colours.

When we mix two primary colours together, we result with a secondary colour; any colour opposite a colour is known it's complimentary colour; e.g. blue is complementary to the colour orange. A tertiary colour is made from mixing either two secondary colours or a primary with a secondary colour.
Knowing colour theory is helpful for when working on illustrations and concept art because certain colours will always look better together than others.
The colours Hue is the position on the colour wheel; Saturation is how rich the colour is shown with greys being the lower end and neon colours being a high value.
A warmer colour such as red will always appear closer than the cooler colours such as blue.
Tone
Here is a tonal palette of colours between black and white that I have created in Photoshop.

Tone is the value of darkness and lightness used to render images on a flat surface.
Tone is the value of darkness and lightness used to render images on a flat surface.
Tuesday, 4 February 2014
Menus and Composition
Week 18, today I gathered screenshots from in game menus to use as ideas. Tony gave a short presentation on composition.
Tuesday, 28 January 2014
Mood Boards with Tony
In today's lesson with Tony, we were in the mac computer room and he gave a presentation about mood boards.
One of the roles of a mood board is to establish a palette and to gather ideas for a design.
An archetype is the first of it's kind, a stereotype is when there are more than one of it's kind.
Our task for today is to create a mood board of a character, with the goal of creating the bust of the character.
- Research/Assemble technical references - e.g. costume, weapons.
- Research/Assemble archetype characters/faces - (consider as casting list).
- Research Setting - urban/landscape/architectural details/culture & period.
- Include element of appropriate typography/fonts. (Maybe natural form/environmental).
- Establish colour palette (and colour swatch).
- Synapsis & name of game.
Tuesday, 21 January 2014
pirate week 16
Today we were drawing a model dressed up as a pirate in Tony's class. The aim of the lesson was to create a realistic looking life drawing.


I think the end drawing was a success because it has a realistic look to it for the most part, the lower end of the image where the hand and gun is needed more work doing to it though. The shading and colours used on the face, hat and clothing seem to work really well.


To begin with I did the drawing in charcoal to make sure everything looked okay, then it was time to colour it in using pastels.

I think the end drawing was a success because it has a realistic look to it for the most part, the lower end of the image where the hand and gun is needed more work doing to it though. The shading and colours used on the face, hat and clothing seem to work really well.
Subscribe to:
Comments (Atom)