Friday 25 October 2013

Creating flora with Opacity mapping and a level of detail version

This week I have been working on a model of a banana plant. It is also the first time that I have used Opacity Mapping


Here is the texture I used for the model

I copied the texture into a new Photoshop document and coloured all the solid areas in white (RGB 255,255,255) and the transparent areas in black (RGB 0,0,0). 


In the 3ds Max texture editor I added an Opacity map and selected my alpha map image. 

Here is how the Opacity map and texture appears on the leaves

This is how the full model looks

To make the low poly Level of Detail version I rendered the model with the Front and Left viewports (saving each one as a PNG file). I then loaded the images into Photoshop and created 2D textures by resizing them to fit 512x512 pixels. 


To create the Alpha maps textures, all I needed to do was Duplicate the layer from each texture into a new document, added a black background layer (RGB 0,0,0) and then selected the pixels for the tree using the control key and mouse clicking on the layer icon and filled them in white (RGB 255,255,255) by pressing ctrl + delete. 


The low poly tree consists of 2 planes, rotated 90 degrees and a third plane for the bananas


Banana Musa (click to view in 3DBanana Musa

Banana Musa LOD (click to view in 3DBanana Musa LOD

Friday 18 October 2013

Seamless Texture Creation

Today I learnt how to create seamless textures in Photoshop from photographs. 

I used the Crop tool to select the part of the image that I wanted to use and then entered the dimensions 512 by 512. 

I learnt to use the Offset Filter in Photoshop with the Wrap Around option selected. I set the offset values to half the image size (256 by 256) and this allows you to see what the left side looks like next to the right side. Then after using the Offset Filter, I was able to use the healing brush to remove the seams. 

Thursday 17 October 2013

Delorean Task

I was given the task of texturing this DeLorean model. 

I used the unwrap UVW modifier to begin texturing, it was a very long process. Here is the final texture map: 

Textured DeLorean

I decided to create a specular map for the model so that different parts of the model would appear more metallic. I achieved this by copying the texture into Photoshop, desaturating it and then by changing the brightness to however specular it needed to be (the white areas are most reflective).

Whilst looking at photograph references, I added some extra parts to the vehicle (whilst keeping it to less than 1500 triangles). 

Some of the things I used and learned whilst working on this project were: 
Extrude, Bevel, Bridge, Boolean Compound Objects, The Reset XForm utility, Flipping Faces, Collapse All Modifier, Quick Planar Map and Quick Peel. 


DeLorean DMC-12 Time Machine (click to view in 3D)

;
DeLorean DMC-12 Time Machine

Tuesday 8 October 2013

Colour Theory - week 4

Today we learnt about colour theory with Tony's lesson, we did colour wheels, neutralisation, juxtaposition, secondary colours, complementary colours, harmony, discord, neutrals, colour perspective and mixing. The aim was to learn about how colours work together in various ways.


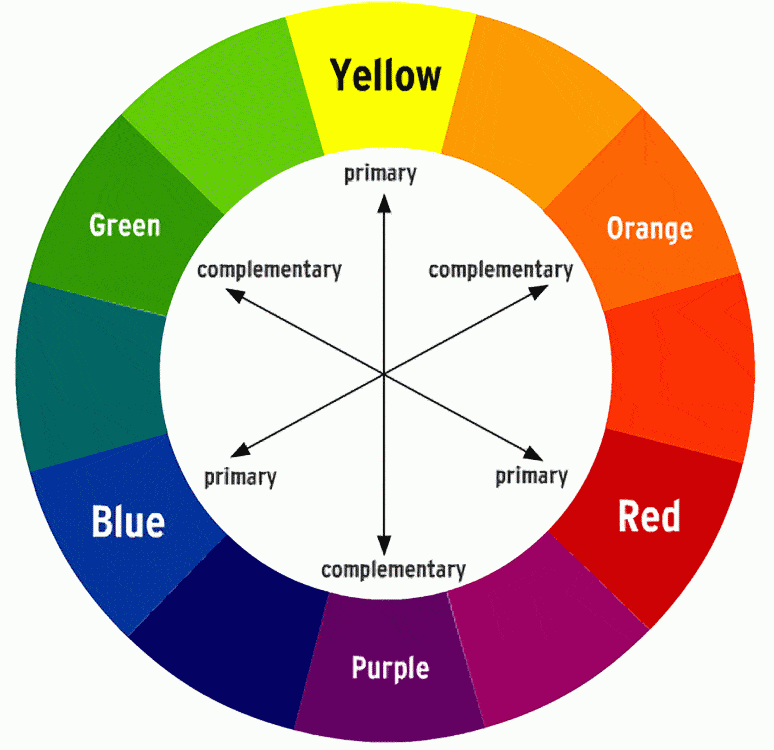
The colour wheel allows us to see which primary colours go into making up secondary and tertiary colours; red and yellow makes orange (a secondary colour), orange and yellow makes up a lighter orange (tertiary colour), it also allows us to see which colours go well with one another such as blue with orange (complimentary colours).

The tertiary colours are red-orange, yellow-orange, yellow-green, blue-green, blue-violet, and red-violet.

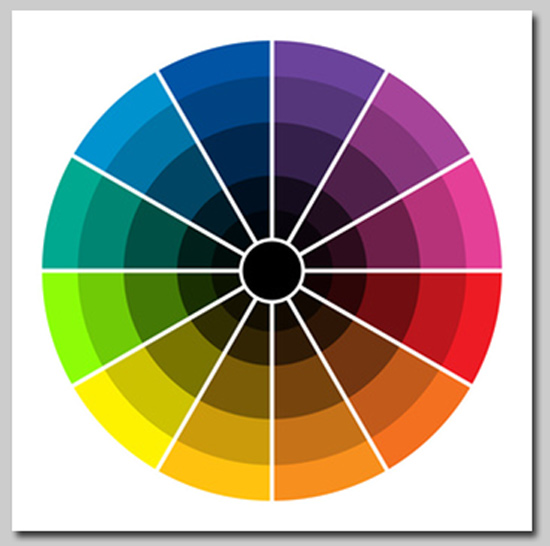
Hues are created by adding either black or white to the colour.

The chromatic scale is when there are varying levels of white or black added to the colour.

Jextaposition is when multiple colours are placed close together and this creates different effects depending on which colours are used.

Blue on red will have a different effect to red on blue, the different colours create different after images and this is what affects the perception of the colours.


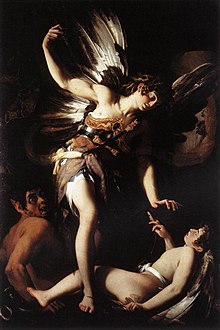
When 7 of the class went to the Eurogamer Expo on a college trip, the 3 of us that didn't go were left behind to do an extra lesson with Tony; Tony set up a scene for us to draw using an abstract impressionistic style.

The windows were closed to try and darken the room as best as possible and we used black paper with coloured chalks to draw the scene. The lights set up were warm red lights which helped create the glowing and opaque effects on the balloons.
This was my drawing at the end of the day, the parts I am most please with is the lighting and the shades of colour which give it the impression of being 3 dimensional.

Subtractive Primary Colours 

When it comes to printing, a printer uses Cyan, Magenta, Yellow and Black.

Cyan and Magenta makes Blue;
Magenta and Yellow creates Red;
Yellow and Cyan makes Green;
Cyan and Magenta plus Yellow creates Black.

Subtractive means that the colours absorb and reflect light rather than create it, this is the difference between viewing something on a computer screen (digital etc) and viewing something such as paper. Red objects will absorb green and blue light, reflecting only the red back at you.

Additive Primaries

These colours create light, these usually come from a computer or television screen (creates light). The colours on the screen are created from Reds, Greens and Blues.

Red and Green makes Yellow;
Red and Blue creates Magenta;
Blue and Green creates Cyan;
All three colours together create white light.

The difference between Additive and Subtractive is in the name, the additive colours are light sources and subtractive colours are created by the way they absorb or reflect light.

Interestingly, the Subtractive Primary colours happen to be the secondary colours in the Additive Primary colour wheel.

Friday 4 October 2013

Unwrapping a Cylinder

The differences between unwrapping box shapes and more advanced shapes such as cylinders is that cylinders have many more faces to texture. 

To unwrap a cylinder we first select the top and bottom of the cylinder and using the Quick Planar tool, position the faces in the UVW map window. 


Next we want to unwrap the sides of the cylinder by selecting the faces around the cylinder and then using the Cylindrical Map option under the Projection tab. Taking the Scale tool within the UVW window, we can scale the textures to the correct proportions. 


Once we have all the UVWs scaled correctly, we can use the Pack tool to arrange the UVWs into the texture space. 


Now we can use the Render UVW Template option in the Tools menu to create a texture base for editing in Photoshop later. 


The Amazing Barrel (click to view in 3D)

The Amazing Barrel

Tuesday 1 October 2013

Geometrical Analysis of underlying form - week 3

Week 3; today we did Geometrical analysis of underlying forms. The task was to draw either a natural or man made form, I chose to draw the natural object which was an old sheep's skull. The idea behind the lesson was that it would help us to improve our understanding of 3D model wire-frames. Chiaroscuro was the word of the day, it means a high contrast between light and dark.


Both drawings

For this drawing I first started off by drawing shapes and drawing the underlying forms. The technique allowed me to see how the skull is formed and allowed me to draw what was there rather than what I see. The drawing was done in chalk, charcoal, compressed charcoal and pastels on blue paper. The shadows were done using the charcoal and rubbed into the paper. I think that the drawing technique works well because drawing in the form allows me to draw the correct proportions for the object and to make it lifelike; it also allows me to understand the object form better which should help when it comes to modelling in 3ds Max.

Georgina O'keefe's skull drawings are great examples of the technique.
The contrasts in the images bring out the form really well. 

Chiaroscuro can be seen in Giovanni Baglione's Sacred and Profane Love painting with it's rich use of light and dark contrasts.